How to Install Glued Down Vinyl Flooring Effectively?
Glued Down Vinyl Flooring has become a popular choice for both homeowners and professionals. The industry expert, John Smith, a flooring contractor with over 15 years of experience, states, "Proper installation of glued down vinyl is crucial for durability." This highlights the importance of technique in achieving a long-lasting finish.
Choosing the right adhesive and surface preparation is key. The flooring must be laid on a clean, dry surface. Many overlook this step, leading to complications later. Moreover, it’s essential to understand the climate of your area. Humidity can affect the adhesive, making installation even trickier.
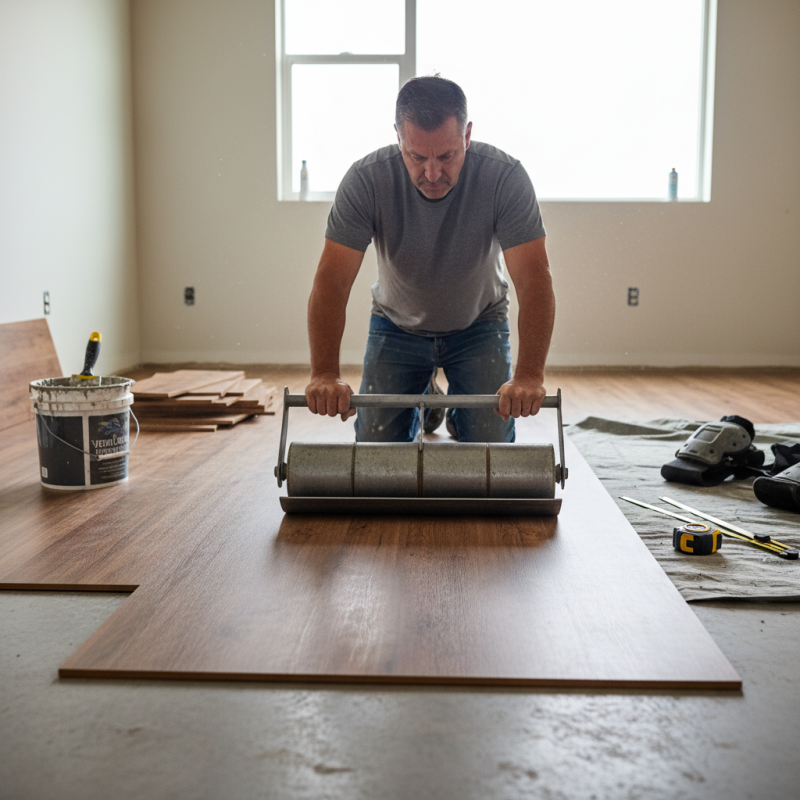
Pay attention to details, as small mistakes can lead to big issues. Use a heavy roller to ensure the flooring bonds with the glue effectively. Remember, every step counts. Mistakes in earlier stages can affect the final look and feel. Taking the time to reflect on each phase of the installation minimizes risks and ensures satisfaction with your Glued Down Vinyl Flooring.
Understanding Glued Down Vinyl Flooring: Types and Benefits
Glued down vinyl flooring is gaining popularity for its durability and design versatility. According to recent industry reports, the market for vinyl flooring is projected to reach $21.85 billion by 2026. This significant growth reflects the increasing preference for resilient flooring options among homeowners and businesses alike.
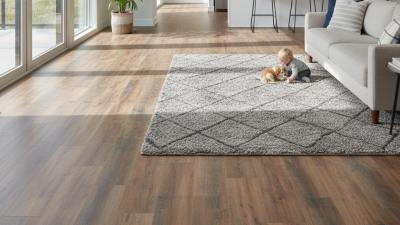
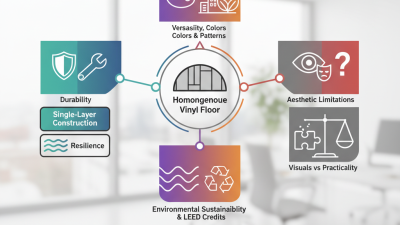
There are different types of glued down vinyl flooring, including sheet vinyl and luxury vinyl tile (LVT). Sheet vinyl offers a seamless look, making it ideal for areas prone to moisture. LVT, on the other hand, mimics natural materials like wood or stone. This appeals to consumers who value aesthetics without compromising on performance. Both types showcase impressive wear resistance, making them suitable for high-traffic areas.
Installation can be challenging. A clean and dry subfloor is essential for proper adhesion. Any imperfections may impact longevity. It's also vital to allow the vinyl to acclimate to room temperature before installation. Despite its advantages, some may find the adhesive's odors concerning. Understanding these factors can guide informed decisions for successful flooring projects.
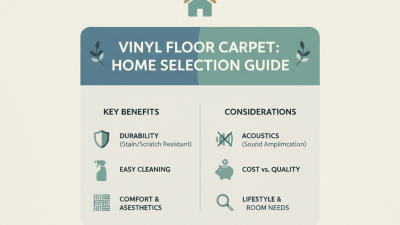
Benefits of Glued Down Vinyl Flooring
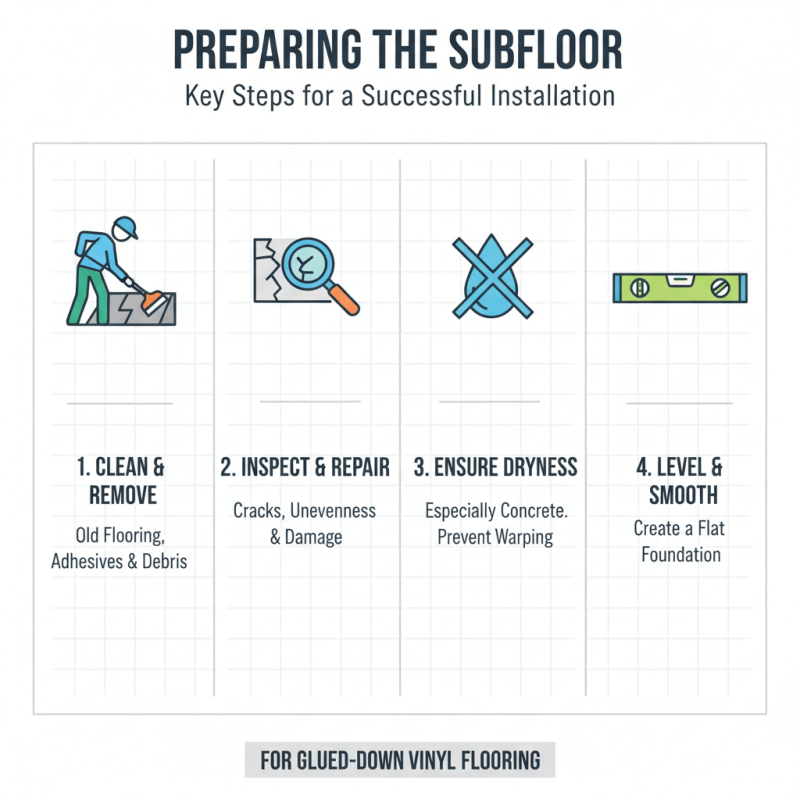
Preparing the Subfloor: Key Steps for a Successful Installation
Preparing the subfloor is crucial for successfully installing glued down vinyl flooring. A clean, dry, and level subfloor sets the foundation for a long-lasting and beautiful floor. Begin by removing old flooring materials, adhesives, and debris. Inspect the subfloor for any damage, such as cracks or unevenness. These issues need addressing before installation. If the subfloor is concrete, ensure it’s completely dry. Moisture can cause vinyl to warp.
Next, leveling compounds may be necessary. They help create a flat surface. Applying these compounds can be tricky; you might need a professional for large areas or significant height differences. Once the subfloor is level, vacuum it thoroughly to eliminate dust. This prevents adhesion problems later on. It’s important to wait for any leveling compound to cure fully.
Finally, allow the subfloor to acclimate to room temperature. This usually takes 48 hours. Skipping this step may lead to expansion or shrinkage of the vinyl. Ensure the internal environment is stable during installation. Watching for these details will significantly influence the final outcome. Not every attempt will be perfect, and learning from missteps is essential for future projects.
Essential Tools and Materials for Glued Down Vinyl Flooring
When installing glued down vinyl flooring, having the right tools and materials is crucial. A utility knife is essential for cutting the vinyl sheets precisely. Use a straight edge for clean, straight lines. Additionally, you will need a trowel for spreading adhesive evenly. A roller helps to ensure proper adhesion after laying the flooring. According to industry reports, proper adhesion can extend the lifespan of your flooring by 30%.
Good quality adhesive is crucial. Water-based adhesives are popular due to their low VOC emissions. However, solvent-based adhesives offer stronger bonds for high-traffic areas. Consider the size of your room when purchasing materials. Many underestimate adhesive quantity. Too little can lead to peeling, while too much can waste your budget.
Another important detail is the underlayment. This can improve sound insulation and provide cushioning. Many installers overlook this step, leading to regret later. Not every subfloor is the same. Ensure the surface is clean and dry; otherwise, adhesion will fail. Reports suggest that improper preparation can reduce flooring performance by 25%. Check all your tools and materials before starting. This can save time and frustration during installation.
Step-by-Step Installation Process for Glued Down Vinyl Flooring
Installing glued down vinyl flooring can be a straightforward task if approached methodically. Start by preparing the subfloor. Ensure it is clean, dry, and level. Any debris or moisture can lead to issues later. Use a leveling compound for bumps or dips. This step is crucial. An uneven surface can cause the vinyl to wear unevenly.
Next, roll out your vinyl sheets or tiles in the desired area. Allow them to acclimate to the room temperature. This adjustment period typically lasts around 48 hours. Measurement and cutting are essential here. Utilize a sharp utility knife to achieve clean edges. Double-check your measurements before cutting to minimize waste.
Once everything is prepared, apply the adhesive according to the manufacturer's instructions. Using a notched trowel ensures even distribution. Working in manageable sections can help avoid premature drying of the glue. After placing the vinyl down, use a roller to press it firmly. This step helps eliminate air pockets. Pay attention to corners and seams. Over time, these areas can cause lifting or curling, which can be frustrating. If you notice imperfections, revisit problematic areas for adjustments.
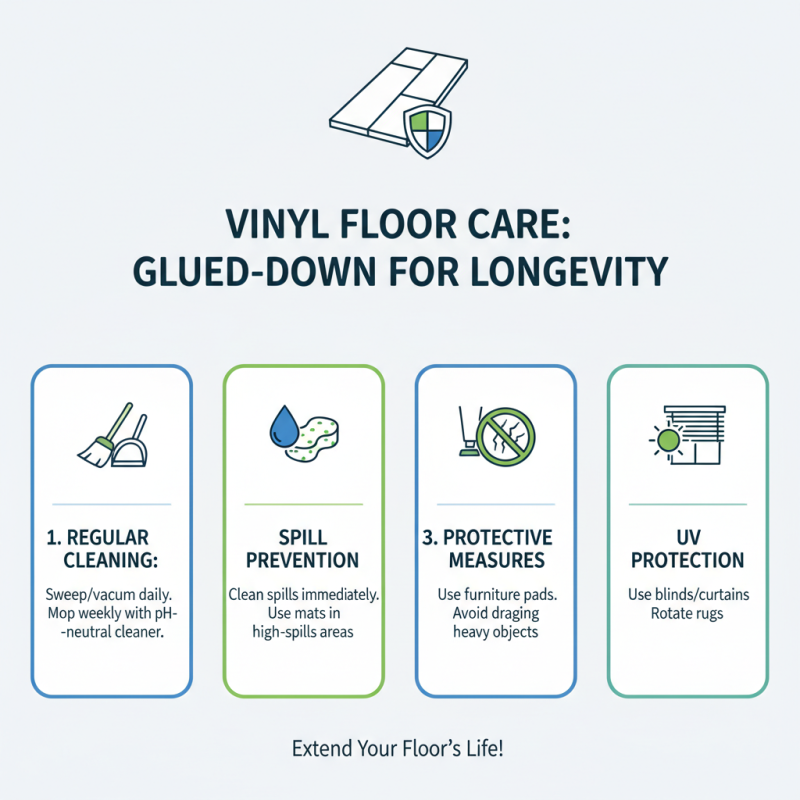
Maintenance Tips to Extend the Life of Your Vinyl Flooring
Maintaining your glued down vinyl flooring is essential for longevity and appearance. Regular care can prevent damage and keep it looking fresh. Here are a few practical tips to help you along the way.
Start with daily cleaning. Sweep or vacuum to remove dirt and debris. This task keeps your floor's surface scratch-free. For deeper cleaning, mop with a gentle cleaner specifically designed for vinyl. Avoid harsh chemicals. They may damage the finish and color.
Spot clean spills immediately. This can prevent stains from setting. Use a soft cloth and warm, soapy water for most spills. Rinse with clean water and dry thoroughly. If your floor begins to dull, consider using a polishing solution. Test any product in a small area first. Not all solutions work equally, and a wrong choice can lead to frustration.
Finally, address wear and tear quickly. If you notice scratches, use a repair kit made for vinyl. It's often tempting to wait, but repairs can prevent larger issues. A proactive approach will save you time and money in the long run. Maintain your space, and enjoy your beautiful flooring for years to come.